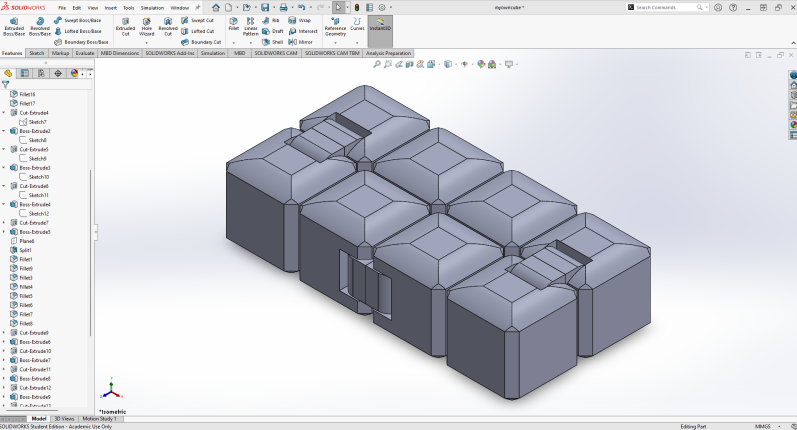
Designing the Infinity Cube
This cube was modeled entirely in SolidWorks, where I used precise dimensions and mechanical constraints to ensure that each piece would rotate smoothly and fit together perfectly after printing. I paid close attention to the size and placement of every hinge, edge, and joint to create a design that feels satisfying in the hand while remaining quiet and unobtrusive—ideal for students who need a subtle way to manage stress or stay focused.
The cube went through several design iterations to improve its durability and reduce friction during movement. I also made sure to keep the geometry printer-friendly, with minimal support material needed and tolerances that work well with most standard FDM printers. The result is a fully functional, compact fidget cube that’s not only easy to print but strong enough to withstand regular use by kids of all ages.
Infinity Cube Printing
This timelapse captures the full 3D printing process of the infinity cube, from the first layer to the finished parts. The design was first modeled in SolidWorks, then exported and processed into G-code using slicing software. That G-code gives the printer exact instructions—movement paths, temperatures, speeds—to build the cube layer by layer. The full print takes several hours, and once complete, each piece is carefully removed, cleaned, and assembled by hand. This is the process I follow for every cube I create and share with students.